Editing Areas
You can edit the vertices of an area or drag it in the viewport to change an area's coverage.
-
Select Imagery
 . The Imagery panel opens.
 -
Do either of the following, depending on the area you want to edit:
-
Select an Existing Area Next to the area you want to edit, select the menu
 , then select Edit Area.
 -
Add a New Area Select New Area, then draw a new area. See Adding Areas. In the area toolbar, select Edit Area.
The viewport zooms to the area's extent, and the area becomes editable.
-
-
Do either of the following, depending on the shape you are editing:
 Edit a Rectangle
-
Make changes to the rectangle's shape or location.
-
Click and drag a corner or side to resize the rectangle
-
Hold SHIFT, then click and drag a corner or side to rotate the rectangle
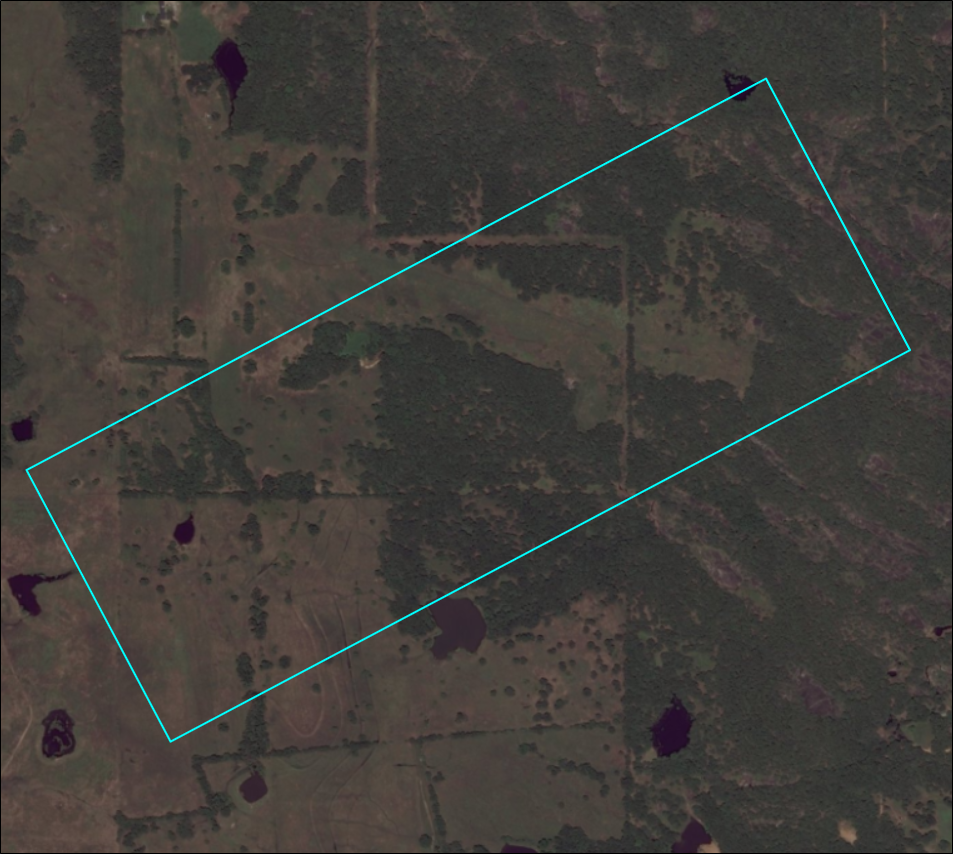
A rotated, rectangular area
-
Click and drag the center of the shape to move the entire area around the map
As you edit the rectangle, you will see the length of each segment and the total area of the rectangle.
-
Edit a Polygon
-
Make changes to the polygon's shape or location.
-
Click and drag a vertex to move it
-
Click and hold anywhere on a side to add a vertex, then drag the vertex to move it
-
Click and drag the center of the shape to move the entire area around the map
As you edit the polygon, you will see the length of each segment and the total area of the polygon.
-
-
-
When you are finished editing the shape, select Finish Editing Area. Select Cancel to return the area to its original shape and location.
The updated area is automatically saved in the Imagery panel.
-
To close the toolbar, select Save Area.
More About Editing Areas
-
When editing an area, to remove a completed—but unsaved—shape from the viewport, on the areas toolbar, select Remove Shape. Draw a new area or select Cancel.
See Adding Areas.
-
Areas are automatically named (e.g., "Area 1," "Area 2"). If you want to rename the area, in the Imagery panel, select the menu
, then select Rename Area. In the field, enter a new name for the area, then press Enter.