Importing Areas
In addition to drawing areas to define a location of interest, you can also import existing areas.
Select the Create Area tool. The Create Area options display.

Add Area options.
Select Import.
In the dialog, do one of the following to select the file you want to import:
Drag and drop a file from your computer into the dotted area.
Select Select from Computer. In the dialog that opens, locate the file you want to import, then select Open.
Supported file types:
Shapefile
KML
GeoJSON
You can upload up to 1000 areas in a single zip file.
The file uploads.
Added areas are indicated by a green check
 .
.Imported areas are auto-named in two ways:
Unique ID By default, the system assigns a unique ID to each area (e.g., filename + 1, 2, 3, etc.).
"Name" Field If the file you uploaded contains a "name" field, the system uses the specified name(s) from the file to name each area.
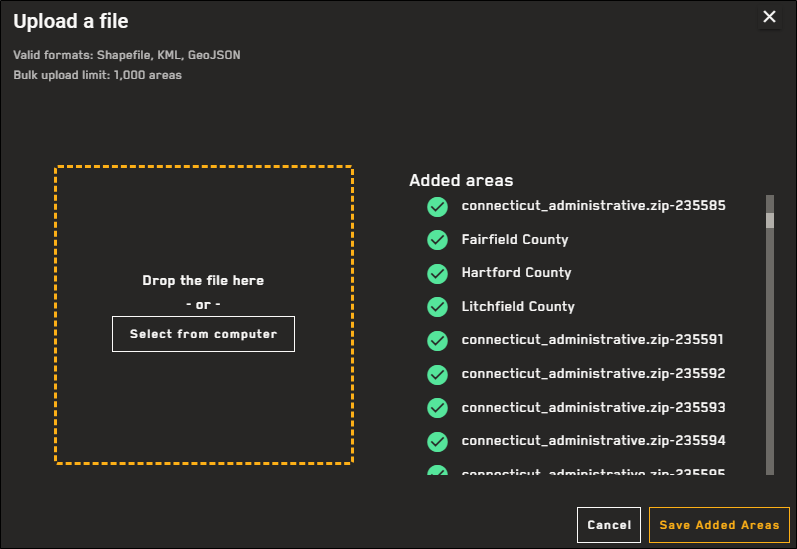
Two examples of imported areas: one imported using a "name" field, and one imported using a unique ID.
Unaccepted areas/files are indicated by a red triangle
 .
.Areas must be simple, closed polygons. Areas that do not conform to this geometry are not uploaded.
Select Save Added Areas. The area(s) are saved in the Search Results panel and are added to the viewport.
More About Importing Areas
Areas cannot exceed 5,000,000 sq km. If your area is larger than 5,000,000 sq km, you will receive an error.
You can draw/import multiple areas and have multiple areas available in the Search Results panel. However, you can only expand imagery results for one area at a time. New areas are automatically expanded when you draw them; collapse the new area to see all areas, or select the More Areas button at the bottom of the Search Results panel to quickly select and view a different area.

More Areas button
If an imported area has more than 1000 vertices, it is automatically simplified to comply with order standards (i.e., fewer than 1000 vertices, simple geometry).
You can search for one or more image IDs using the Search Results panel. If you search for an image ID and the image is found, an area is drawn around the image and it is added to the search results. Each found image is added as a separate area. Expand any area to view the image and its metadata.
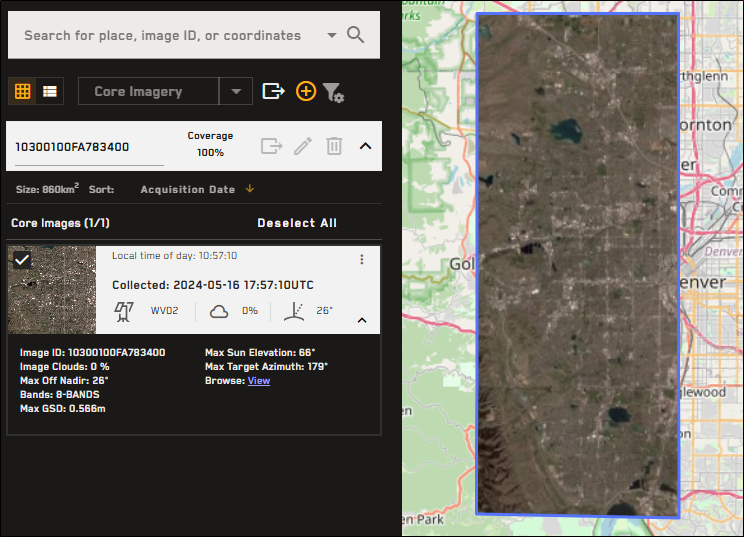
Search for an image ID using the Search Results panel to add the image as an area. Expand the area to view the image and its metadata.

You can also search for multiple image IDs at once to add each image ID as a separate area.